
After successful installation of the Hot Homes real estate template, there are few steps that you should perform in order to completely replicate our demo site. These steps are necessary because it’s not possible to copy Joomla! user accounts via quickstart installation (it’s unsafe). Also, the ReCaptcha plugin must be configured separately for each site.
Make User Accounts (Agents)
You can create user accounts as usually through Joomla! Go to Users > Manage and click New. If you want a user to be able to add properties through Joomla front-end, you should assign him/her to the Author user group.
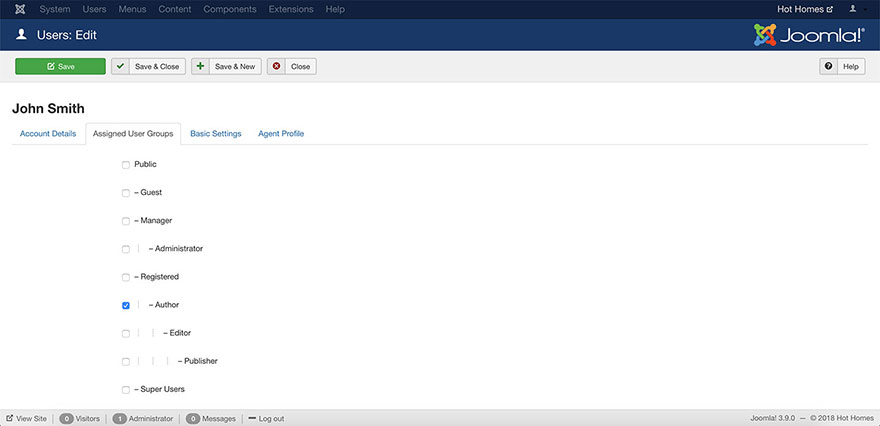
You can add as much user accounts as you need.
Users can also register their accounts through Joomla! front-end as usually. However, only administrators can assign user group of the registered user to the “Author” level (via backend).
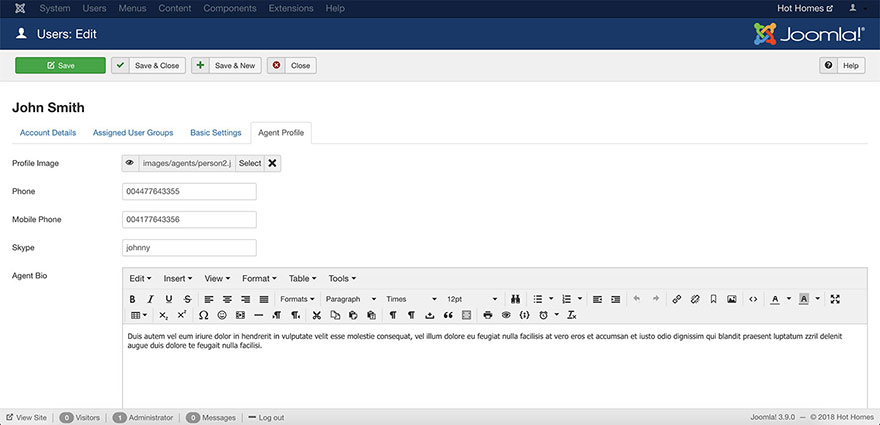
Also, don’t forget to insert data under the Agent Profile tab. This data will be displayed under each property listed by this agent.
Assign Existing Demo Properties to Agents
The quickstart installation copied all the articles (and property listings), but they are all assigned to the super administrator after installation. You can edit each of the properties (articles) and assign an appropriate agent that you created in the previous step.
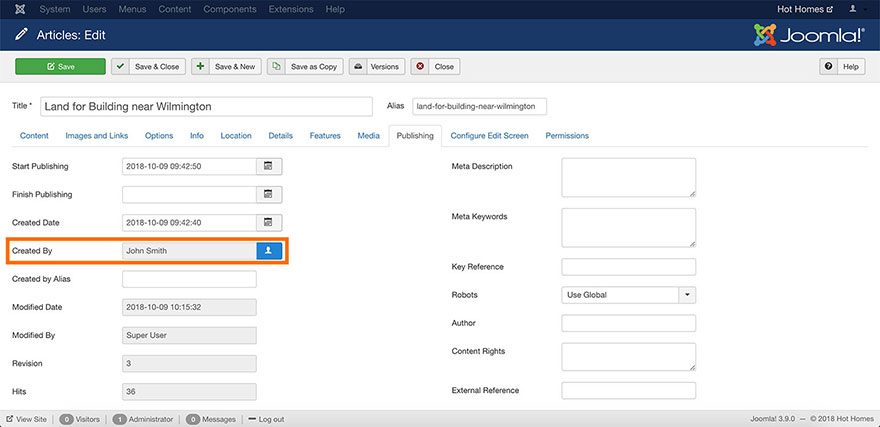
After you assign an agent, under the property listing you will see the agent’s profile. Also, there will be a contact form that prospective clients can use to contact the agent.
Setup reCAPTCHA in Joomla
Go to System > Global configuration and for Default Captcha select option CAPTCHA - reCAPTCHA. Save the settings.
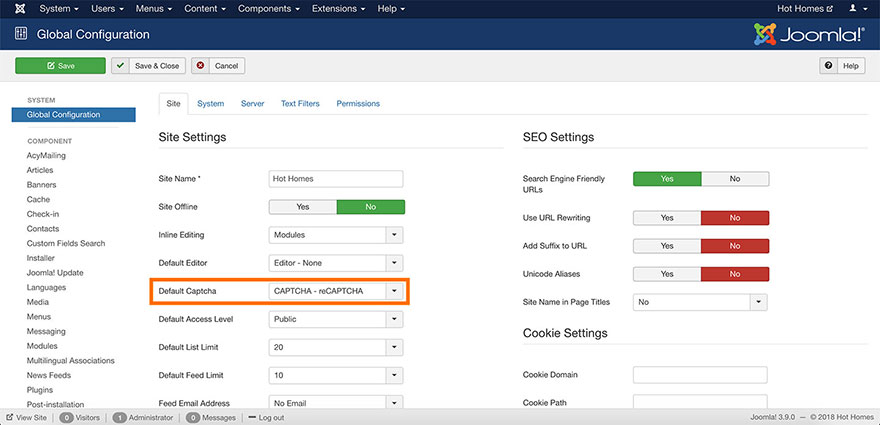
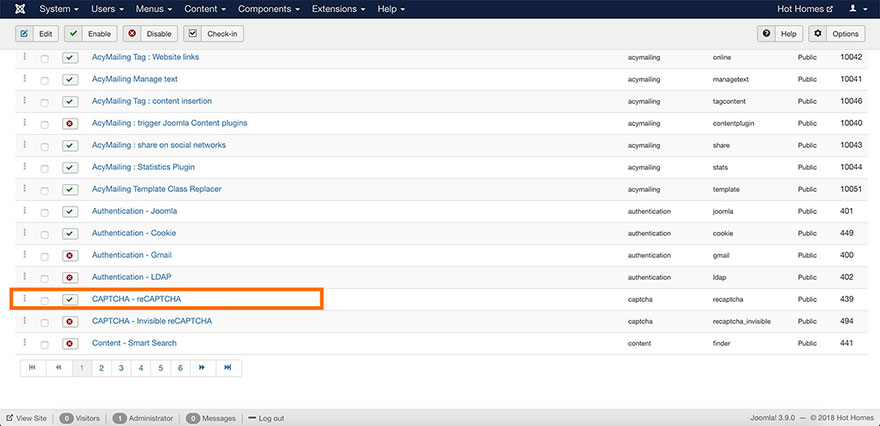
Next, go to Extensions > Plugins and make sure that plugin CAPTCHA - reCAPTCHA is published.
You should obtain these keys for your site from Google here: https://www.google.com/recaptcha.
Make sure you are logged in to your Google account. Under Register a new site add your site’s label (any text), select reCAPTCHA V2 > Checkbox and under Domains enter your domain name. When you click Register, your site will be registered and your should see it in the list of Your reCAPTCHA sites.
Click on your site on this list and under Keys, you’ll find your Site Key and Secret Key.
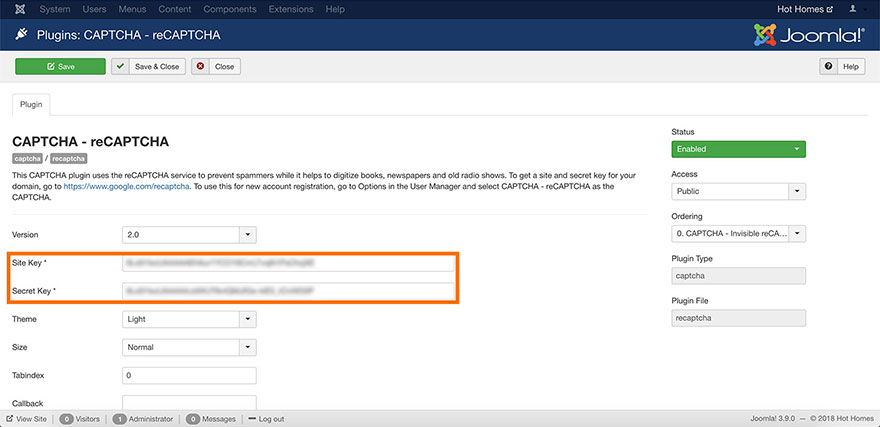
Finally, go to Extensions > Plugins and click CAPTCHA - reCAPTCHA plugin to open the plugin settings. Enter your Site Key and Secret Key and save the plugin’s settings.
Add Text to the Language File
Please edit file /templates/sparky_framework/language/en-GB/en-GB.tpl_sparky_framework.ini and add these lines:
TPL_SPARKY_FRAMEWORK_CF_ADDITIONAL_DETAILS="Additional Details"

TPL_SPARKY_FRAMEWORK_CF_FEATURES="Features"
TPL_SPARKY_FRAMEWORK_CF_FLOOR_PLANS="Floor Plans"
TPL_SPARKY_FRAMEWORK_CF_AGENT="Agent"
TPL_SPARKY_FRAMEWORK_CF_INQUIRY="Inquire about this property"
TPL_SPARKY_FRAMEWORK_CF_INQUIRY_NAME="Your Name"
TPL_SPARKY_FRAMEWORK_CF_INQUIRY_EMAIL="E-mail Address"
TPL_SPARKY_FRAMEWORK_CF_INQUIRY_PHONE="Phone Number"
TPL_SPARKY_FRAMEWORK_CF_INQUIRY_MESSAGE="Your message here..."
TPL_SPARKY_FRAMEWORK_CF_INQUIRY_CONTACT="Contact Agent"
TPL_SPARKY_FRAMEWORK_CF_CAPTCHA="Please complete the CAPTCHA."