If you are satisfied with free Hot Bokeh from our free Joomla templates collection, but need to upgrade to premium version and get additional features, this tutorial will help you to upgrade without losing data of the site you created with the free version.
First of all, after successful subscription to our Joomla template club (or after buying single Hot Bokeh template), you should download ZIP archive "hot_bokeh_jXX_unzip_first.zip". In this file, XX is the version that matches your current Joomla version where you installed the free template (for example 25 or 31 for Joomla 2.5 or Joomla 3.1). Unzip this file locally on your computer and you will get 7 more ZIP archives.
Replace free template files with premium template files
Unzip archive hot_bokehXX.zip (XX is the version of Joomla) locally on your computer - you will get one folder "hot_bokeh" and many files inside. Open your favorite FTP client, browse to folder /templates/hot_bokeh on your server. You will see folder "hot_bokeh" there as well. Rename it, in example to "hot_bokeh_old" and upload the folder "hot_bokeh" of the premium version from your computer.
The template upgrade is done and if you open template parameters now (Extensions > Template Manager > Hot Bokeh), you will see 10 color styles available and export option activated.
Install and configure Hot Full Carousel and Hot Film Tape
Responsive Joomla carousel Hot Full Carousel and Hot Film Tape modules are included with Hot Bokeh premium template. You can install them now. In the archive you unzipped previously ("hot_bokeh_jXX_unzip_first.zip"), there are premium modules files "mod_hot_full_carousel25_30.zip" and "mod_hot_film_tape25_30.zip". From your Joomla Administration, go to Extensions > Extension Manager. Click Choose File button and select file "mod_hot_full_carousel25_30.zip". Click Upload & Install button and the module will be installed. Repeat the procedure for file "mod_hot_film_tape25_30.zip".
Now, go to Extensions > Module Manager > Hot Full Carousel and copy all settings from the following screenshots:
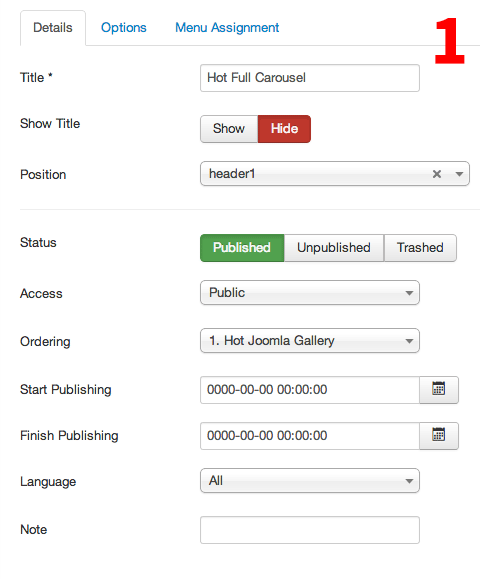
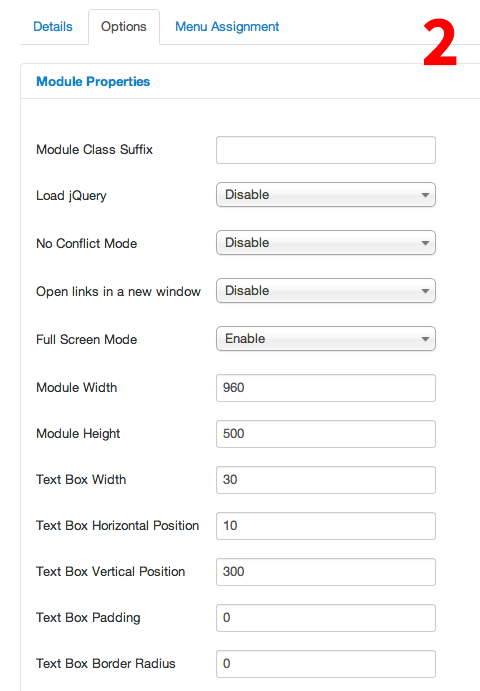
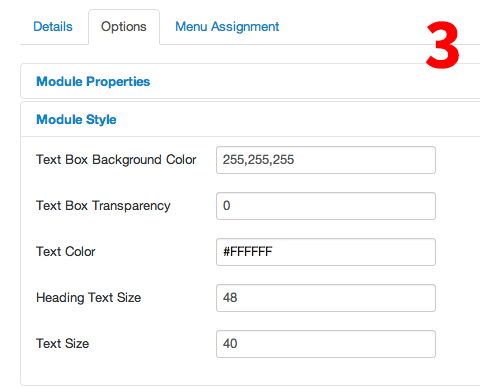
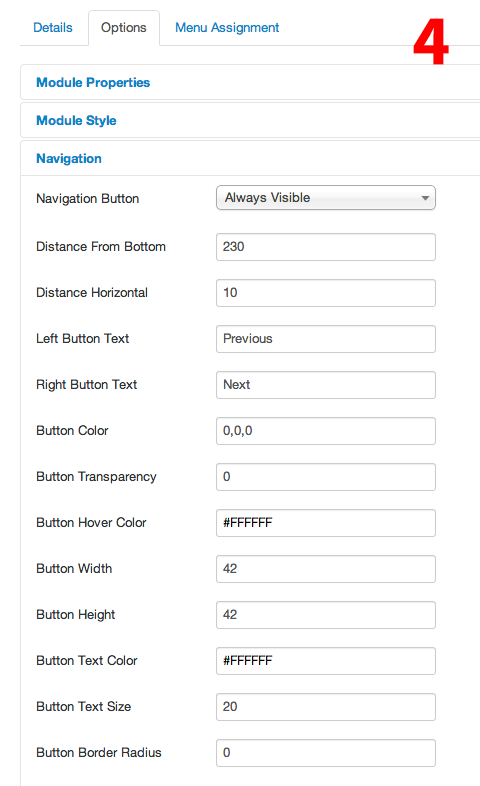
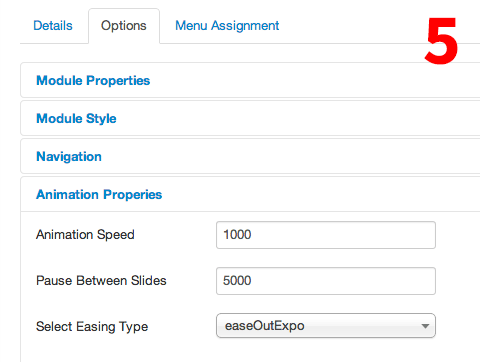
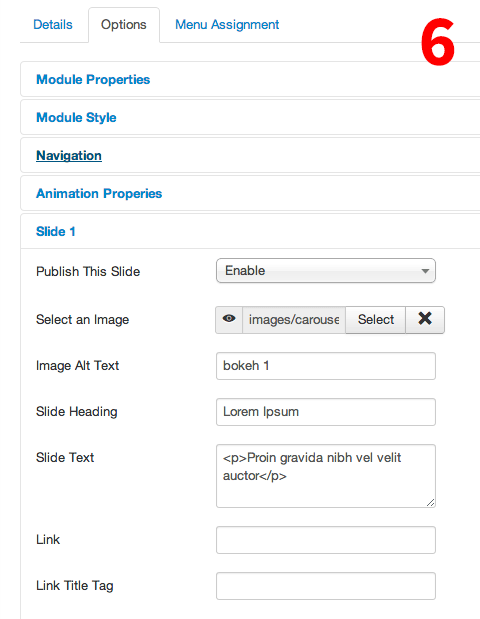
In the last screenshot, you will notice the field "Select an Image". You should select an image for the Hot Full Carousel slide there. If you want original images from our Bokeh demo, unzip archive "hot_bokeh31_hotstart.zip". Now, browse to folder /images/carousel and you will find 4 images there bokeh1.jpg, bokeh2.jpg, bokeh3.jpg, and bokeh4.jpg. Upload folder "carousel" to the /images folder of your website (use FTP client). To pick an image for each slide, in the "Select an Image" option click the Select button, browse to the "carousel" folder and pick an image. You can change default images with your images. It's recommended to make images in resolution 1920 x 500 pixels.
Under Menu Assignment tab, you can select Home (under Main Menu item). This will make the module to appear only on the home page (as on our demo). For Module Assignment option, select "Only on the pages selected" option.
IMPORTANT: Hot Full Carousel will not start working until you enable at least 3 slides.
Let's configure Hot Film Tape now. Go to Extensions > Module Manager > Hot Film Tape. You can copy all the options from the following screenshots:
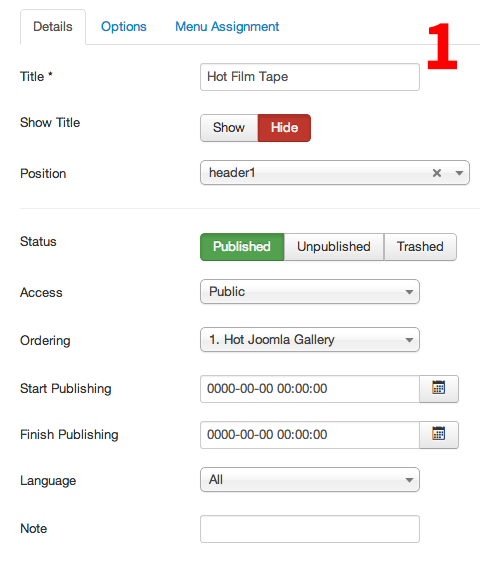
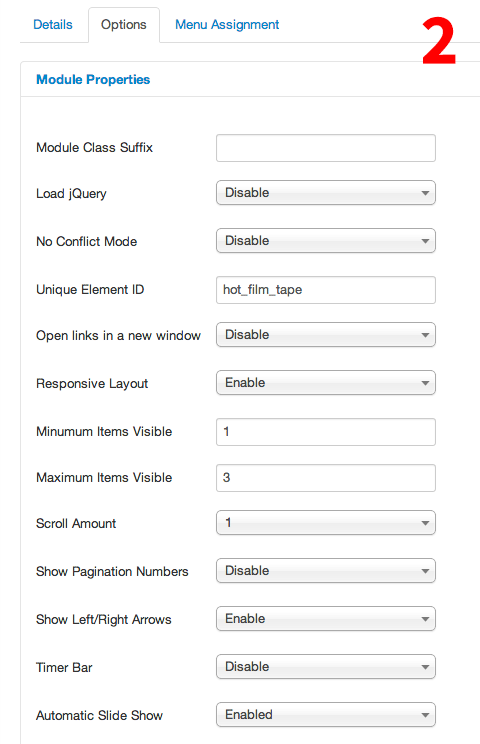
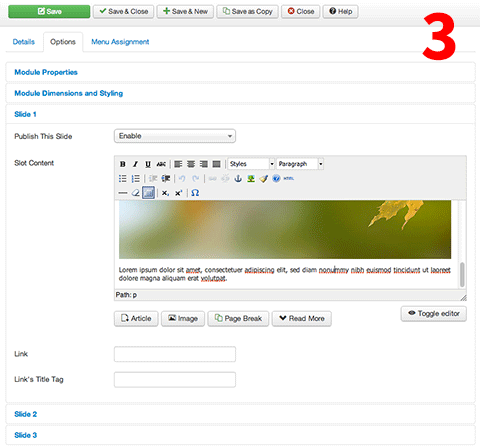
The last screenshot shows one of the available slide slots. There you have editor, so you can put any content you like (text and images). Original images from our demo can be found in folder /images/film_tape. You can get them from the archive "hot_bokeh31_hotstart.zip".
Under Menu Assignment tab, you can select menu items where you'd like to publish this module. If you want the module to be published on a specific page, create a menu item for this page (in Menu Manager > Menu Name), then select this menu item on this list here. For Module Assignment option, select "Only on the pages selected" option.
Install and configure Hot Maps
Hot Maps, Joomla Google Maps module and plugin are included with premium version of Hot Bokeh. After unpacking the file "hot_bokeh_jXX_unzip_first.zip", you will have file "hot_maps_unzip_first.zip". Unpack this file as well, and you will get module and plugin files "mod_hot_mapsXX.zip" and plg_hot_mapsXX.zip (XX indicates Joomla versions). Go to Extensions > Extension Manager, click Choose file and select "mod_hot_mapsXX.zip". Click Upload & Install button and the Hot Maps module will be installed.
Go to Extension > Module Manager > Hot Maps. You can copy all settings from the following screenshots. Make sure you changed our sample address with your real address.
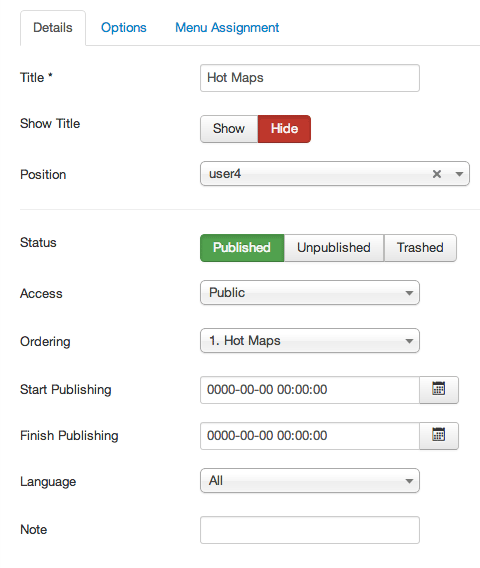
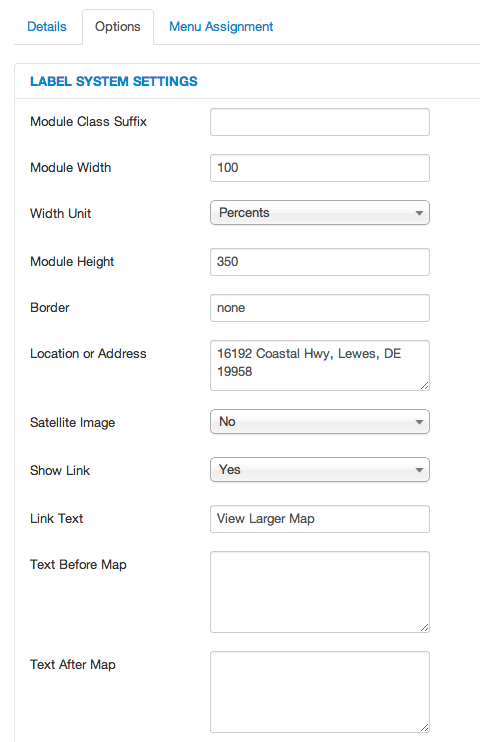
This module should be published on all pages, so in the Menu Assignment tab select Module Assignment: On all pages.
Install and configure newsletter component
Our demo uses free Acymailing Starter from Acyba. You can download this free component from the developer's website. They also have an advanced version of the component. The file that you will receive is named "com_acymailing_starter_XX.zip" (XX is the version number). Go to Extensions > Extension Manager, click Choose file and select the file you downloaded. Click Upload & Install button and newsletter component and module will be installed at once. Go to Components > Acymailing > Lists and create your subscribers' list. If you want to edit other settings of the component, consult documentation.
The settings for the Acymailing module can be copied from the following screenshot:
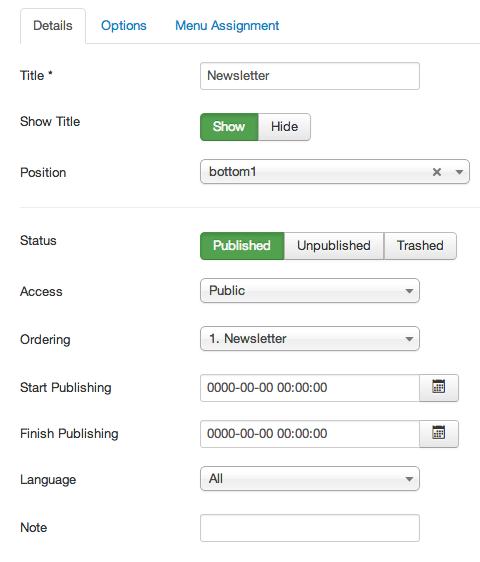
Under Options tab, you can leave all default options, just change Size to 95%.